June 30, 2010

Clay Herb Markers

You may recall that my newest hobby is polymer clay sculpture. I finally got a chance to make something a few weeks ago. I was inspired by the markers in this blog post. I'm not sure how I came up with the idea of using clay instead of a sharpie, but I'm pleased with my results. I wanted the background to look like a terra cotta pot, so I mixed a couple different colors of clay together. My clay/pasta machine is awesome, by the way. Once I got a color I was pleased with, I cut shapes to fit the spoons. Then, because clay only sticks to clay, I used a special glue to adhere the clay to the spoons. The next thing I did was make the letters. I rolled some black clay into a long, round piece, and pinched off pieces to the length I needed. In order to make the leaves as authentic as possible, I dashed out to my herb garden to get these:

I figured it would take forever to make the chive flower look right, so I made more long round pieces, pinched off a bit, folded it in half, and pulled the tips down. Chive leaves are hollow, so I rolled more round pieces. The letters got flattened a bit as I pressed them onto the terra cotta clay. However, I was able to keep the definition of the chive leaves. Two of them didn't adhere, and according to Sculpey's website, the glue should work on clay to clay. Other than the two leaves, everything else is stuck securely together.


For all of the leaves, I blended greens to match the leaves as closely as possible. To get the shape of the Lovage and Basil leaves, I placed the leaves from my herb garden on the clay and carefully cut around them. The Lovage leaf ended up too big, so I cut part of it off. On the smaller leaf, I cut around a shorter part of the leaf, moved it over, and cut around the short part on the opposite side. You can't see it very well in the picture of the Lovage spoon, but if you look at the Basil spoon, you can see that I etched the leaf veins. To accomplish that I very carefully pressed the leaf onto the clay. After removing the leaf, I went over the impressions with a sharp tool to give them more definition.

They aren't outside yet because I want to seal them in some way. Can anyone point me to a website on sealing clay/items that have clay adhered to them? Better yet, can anyone recommend a basics about clay book? The two I borrowed from the library weren't overly helpful. Once I figure out how to seal them, and make sure they'll last a while outside, I'll probably make a few for my Etsy shop.

June 28, 2010

Blog Posts of the Week V

Maybe this should become blog posts of Every Other Week. The last two weeks are something of a blur; I'm not really sure why, but they are. Today, I'm going to try and get caught up on all the bloggy stuff, and then stay caught up with it!

New Share Buttons
First up in my Google Reader, a new Blogger feature: Share Buttons. Being a fan of sharing blog posts, I immediately went and turned the new feature on. Here's a screen shot:

See the buttons under my Etsy preview? If you really like a post and want to share it, those buttons will, from left to right, allow you to 1) Email it, 2)Blog about it (in Blogger), 3)Tweet it, 4)Post it on Facebook, and 5)Share using Google Buzz.

Mini Beatrice
Moving on to the world of tatting, Marty at Tat's All She Wrote tatted a gorgeous doily. I've concluded that I need to get over my fear of doilies, and (once I find a job and have some extra $$) purchase at least one of Iris Niebach's books.

Some Questions

Kelly at Catherine's Crafting was wondering (among other things) what is Tatting Tea Tuesday. That got me wondering as well, and after some searching, I found this link. I think I will join in, although it may not be right away.

From The Craftiblog Two cards from a shoebox gathering. I'm not sure what a shoebox gathering is, but I like the card the author designed, and this one, designed by one of her friends.

Now that I'm caught up on craft blogs, I'm going to try and write a few posts to publish over the next few days.

June 26, 2010

Scrappin' Saturday II

Another Altered Notebook. These pages were among the hardest to design, mostly because I was trying to figure out how to get 12 photos on 2 pages, and still have space for journaling!
 
  • Paper - I used the paper that was included in the scrapbook.
  • Borders - I cut a piece of scrapbook paper to the width I wanted, (12") then used Fiskars Border Punch - Hearts on the edge.
 
  •  Photos - Cropped, with rounded edges.
  • Miscellaneous - I detailed the features of the notebook by writing out what they were, then drawing an arrow to the appropriate photo.
  • Project Pictured - Bride's Altered Notebook


June 19, 2010

Scrappin' Saturday I

After many years of saying I would not get sucked into the Scrapping Fad, I'm enjoying scrapbooking. My first scrapbook is a sort of "brag book"; it has pictures of many crafts I've completed. It's not finished yet, because some of the projects aren't finished. The scrapbook came with a scrapping kit Mom and I picked up at Sam's. At the time we just wanted to use the supplies for card making. While many of them have been used for cards, some of the leftover pieces have found their way into my scrapbook.


  • Background Paper: Vellum printed with various definitions. 
  • Letters: Cuttlebug Alphabet, Red Tag Sale; cut out of a paper called Crushed Suede. The paper has since been discontinued, which is very disappointing - I would love a whole stack of it!
  • Photos: Cropped and corners rounded.
  • Die-Cut: Ribbon Tags Trio by Spellbinders. I cut this out of the cream paper (center) then colored with a dark pen (probably a Sharpie Pen) around the edges.
  • Other Decorations: A couple of small quilled flowers in the center, and a folded rose in the corner. The folded rose does keep the page protector from lying flat, but I'm not overly worried about it since it's on the first page and won't be against any other pages that might get warped by it.
  • Project Pictured - Altered Notebook

June 15, 2010

Belated Gifts

These were Christmas gifts for my cousins; they never got sent. When they came for my sisters wedding, I pulled them out of the bag they'd been sitting in and hand delivered them.
I never quite know what to do for the California bunch. I figured that they most likely had a kitchen set, so I pulled out my Tasty Crochet book and whipped up some ice cream sandwiches. For some reason they all came out different sizes.
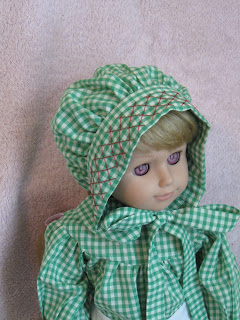
 For my dear little North Carolina cousin, you may remember that I made a doll for her a  few years ago. I finally finished the next outfit! The pattern is McCalls Craft 4333. The pattern is out of print, and I can't find a link for it. Katrina kindly modeled the outfit for me, even though it is rather large for her.


June 14, 2010

Blog Posts of the Week IV

This weeks post is pretty short -I thought I had a few more posts to share, but can't seem to find them.

2010-06-05 CAS No Layer Card with Rose Vine by Stampin' Up
This post is from The Craftiblog. Most of the cards that the author of this blog makes have tons of layers. Not that layers aren't cool, but when I make a card I don't think about layers until I'm almost done making it. It's nice to see a card with no layers once in a while.
 (These aren't too bad, but check out The Craftiblog - her cards are much nicer than mine.)


Balloon Animals
Remember balloon animals? I remember getting a few as a kid. They were fun until you got them home. Then you had to find a place to keep it where it wouldn't get popped, untwisted, or be in the way. They never really lost air, so they just stuck around until I got tired of them and asked one of my parents to pop it so I could throw it out. Now you can knit balloon animals! (That makes them something other than ballons, doesn't it??) Sheri at The Loopy Ewe has this adorable pattern set in her shop.


June 2, 2010

Blog Posts of the Week III

This bunch of posts spans two weeks since I pretty much quit reading blogs the week before the wedding.

First, my Mom blogged about the ring attendant's pillow that she made for the ring attendant. It's a gorgeous pillow, and I think it's nicer than anything I've seen in stores.

Knitted Bear is expecting, and knitting lots of baby things. These bibs are awesome, and are going on the "to make for my hope chest and/or any pregnant friends" list.

Catherine's Tatting Attempts has some kitties that like to help with tatting. They look so sweet in the pictures, though. I've yet to have our kitties try to help with tatting, but they have tried to help with scrapping, knitting, and quilling projects. The picture on the left is one of my little 'helpers'.

This is one of three posts from Feelin' Feminine. This post has a detailed tutorial on how to fix corner tears in a skirt or dress. I've only had a tear like this once that I can remember. I mended it, but every time I see it, it says "Sarah mended this."

The second post from Feelin' Feminine is for a natural bug repellent. People tell me that the price for being so sweet is being a perpetual target for mosquitoes and other nasty biting bugs. I usually use a repellent with Deet in it, but someone recently told me that Deet could cause some health problems. I'll be mixing some of this repellent up very soon!

The third post from Feelin' Feminine is about Jewelweed. I have never heard of this before, but apparently it helps with acne.  Do you or anyone you know use it? Where do you purchase it from? I have super sensitive skin, and am always looking for gentle ways to deal with acne.

June 1, 2010

Wedding Gift: Quilled Coasters

Having become slightly paranoid about privacy lately, and wanting to protect the privacy of others, I will be referring to my sister and brother-in-law by their initials; G and A.


  The wedding is over! I'm still recovering, but everything went smoothly. Upon seeing the quilled coasters that I finally finished last year, G and A requested a monogrammed set of coasters. They chose the letter style and coaster shape; the rest was up to me! They decided on square coasters, which I ordered from the Quilling Superstore. I have to say, I was not overly impressed with the quality, compared with my original coasters. Although they were clearer, you could see little bubbles and swirls in the plastic. Once the quilling is in, you don't really notice. The other snag I ran into was that the sticky background was just a plain sort of cardboard. The original coasters had a white background, enabling me to rearrange pieces a bit. This was one chance only since I had to glue everything to the background paper I chose. Deciding on a background color was fairly simple - I originally wanted to use cream, but Mom didn't have the perfect cream paper in her stash. She did have a perfect brown, though.

 To vary the designs, two were made square, and four go diagonally. I also wanted to keep them somewhat monochromatic, in keeping with the happy couple's decorating style. This worked for the first two designs, but the third needed something to make it pop. This was where my little Altoids box of extra pieces came in handy. I've saved every shape that didn't get used in a project; playing with the different shapes makes it much easier to visualize and plan a design. I had some blue S Scrolls, and kept coming back to the color. It ended up being perfect!
Has anyone ever made coasters before? Where did you get the coasters from? My original coasters came from Michaels, but they only come in a six-sided shape, and are almost always nearly out of them. If I can find a coaster/paperweight at a decent price, that looks nice, I plan to design a few for my Etsy shop.